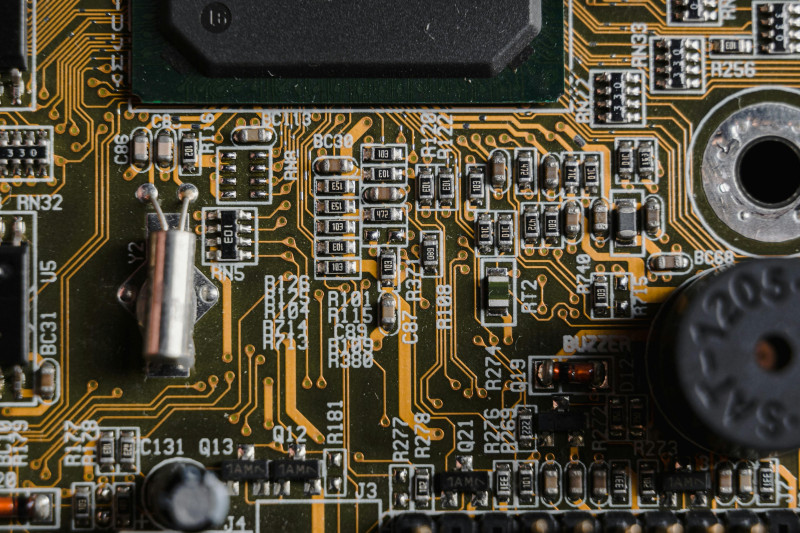
Electronic prototyping has evolved significantly over the past decade, and one of the most transformative tools for beginners is the component generator. This software-driven utility automates the creation of electronic symbols, footprints, and 3D models for printed circuit board (PCB) design. For newcomers, understanding how to leverage a component generator can reduce design time by up to 60%, eliminate manual data entry errors, and accelerate the journey from concept to prototype. This guide provides a foundational understanding of component generators, their practical applications, and how to integrate them into your workflow.
What Is a Component Generator and Why It Matters
A component generator is a specialized software tool that creates the digital representation of an electronic component for use in PCB design software, such as Altium Designer, KiCad, or Eagle. Instead of manually drawing each pin and dimension, you input the component’s datasheet parameters—like pin count, pitch, and package type—and the generator produces the symbol, footprint, and 3D model automatically. This matters because manual creation is prone to errors; a single misplaced pin can cause a board to fail. According to industry surveys, nearly 40% of PCB design revisions stem from incorrect component footprints. By using a generator, beginners can bypass this steep learning curve and ensure their designs are accurate from the start. For example, a standard resistor in a 0805 package can be generated in under 30 seconds, whereas manual creation might take 10 minutes or more, including verification.
Key Features to Look for in a Component Generator
When selecting a component generator, beginners should prioritize features that simplify the process without sacrificing accuracy. The most critical feature is parametric input, which allows you to define component properties like pin spacing, body width, and thermal pad dimensions. Another essential feature is library integration—the ability to export directly into your PCB design tool’s native format, such as .SchLib or .PcbLib. Advanced generators also offer IPC-compliant footprint generation, adhering to standards like IPC-7351B, which ensures compatibility with manufacturing processes. For instance, a generator that supports IPC-7351B can automatically calculate land patterns for a QFP-44 package, reducing the risk of soldering defects. Additionally, look for generators with built-in 3D model generation, as this helps visualize component placement and clearance in the mechanical design phase. Some tools, like the Ultra Librarian or SnapEDA, offer cloud-based libraries with pre-validated components, but a dedicated generator gives you control over custom parts that are not available in public libraries.
Setting Up Your First Component Generator Project
To begin using a component generator, start by installing a compatible tool that integrates with your PCB design software. For this guide, we will assume you are using KiCad, a popular open-source suite, and the KiCad Component Generator plugin. First, download and install the plugin from the official repository. Next, gather the datasheet for the component you want to create—for example, a common NPN transistor like the 2N2222 in a TO-92 package. Open the generator interface and input the package type (TO-92), pin count (3), pin pitch (2.54 mm), and body dimensions (4.5 mm width, 5.0 mm height). The generator will then produce the symbol with three pins labeled Emitter, Base, and Collector, along with the footprint showing the correct pad layout. You can preview the 3D model to verify the component height and orientation. Once satisfied, export the files to your KiCad library folder. This entire process takes approximately 5 minutes for a simple component, compared to 20 minutes manually. Remember to save your project settings for future reuse, especially if you are creating multiple variants of similar packages.
Understanding Parametric Inputs and Datasheet Interpretation
The accuracy of a generated component depends entirely on the parametric inputs you provide, which come from the component’s datasheet. Beginners often struggle with interpreting datasheet diagrams, especially for complex packages like Ball Grid Arrays (BGAs) or Quad Flat No-leads (QFN). For a QFN-32 package, you need to locate the following parameters: overall body size (e.g., 5 mm x 5 mm), exposed pad dimensions (e.g., 3.2 mm x 3.2 mm), pin pitch (0.5 mm), and pin width (0.25 mm). A good component generator will have a visual guide or template that highlights where to find these values on the datasheet. For example, the IPC-7351B standard provides a naming convention like QFN50P500X500X100-32N, which encodes the pitch, body size, and height. By entering these values correctly, the generator calculates the solder mask expansion, copper pad size, and thermal relief patterns automatically. A common mistake is misreading the pin 1 indicator; always verify the orientation mark on the datasheet and set the generator to match. Statistics show that 25% of beginner PCB failures are due to incorrect footprint dimensions, so double-checking your inputs against the datasheet is a non-negotiable step.
Generating Symbols and Footprints for Passive Components
Passive components like resistors, capacitors, and inductors are the most frequently generated parts in any electronics project. For a beginner, starting with a standard 0603 resistor is ideal. In your component generator, select the package type as Chip, enter the body length (1.6 mm), width (0.8 mm), and terminal width (0.3 mm). The generator will create a two-pin symbol with a simple rectangular body and a footprint with two rectangular pads. For capacitors, you may need to add polarity markings if using electrolytic types; the generator can place a plus sign or a notch on the symbol. Inductors often have a higher profile, so the 3D model should reflect a cylindrical or ferrite core shape. One advanced feature to explore is the creation of multi-value passive arrays, such as a resistor network with four isolated resistors in an SOIC-8 package. The generator can automatically assign pin numbers and create a unified symbol with separate pins for each resistor. This saves hours of manual work and ensures consistency across the design. Always verify that the generated footprint matches the manufacturer’s recommended land pattern, which is often provided in the datasheet’s application notes.
Working with Integrated Circuits and Complex Packages
Integrated circuits (ICs) present the greatest challenge for beginners due to their high pin counts and specialized packages like QFP, BGA, and LGA. A component generator simplifies this by allowing you to define a matrix of pins. For a QFP-100 package, you input the number of pins per side (25), pitch (0.5 mm), and body size (14 mm x 14 mm). The generator then arranges the pins in a grid around the perimeter, assigns pin numbers sequentially, and creates a symbol with grouped functions (e.g., power, ground, I/O). For BGA packages, the generator uses a ball grid array template where you specify the number of rows and columns (e.g., 10×10 for 100 balls), ball diameter (0.3 mm), and pitch (0.8 mm). The 3D model will show a matrix of solder balls underneath the package. One critical aspect is thermal pad management: many ICs have an exposed pad underneath for heat dissipation. The generator can create a large central pad with multiple vias for thermal relief. Beginners should also use the generator’s electrical rule check (ERC) feature to ensure no pin conflicts exist, such as two pins with the same net name. This automated validation reduces the risk of short circuits in the final board.
Integrating Generated Components into Your PCB Design Workflow
Once you have generated the component files, the next step is integrating them into your PCB design software. In KiCad, for example, you would open the Symbol Editor, click on the library you created, and import the generated symbol. Then, open the Footprint Editor to load the corresponding footprint and 3D model. Most generators provide a batch export function that allows you to update multiple components at once. For a project with 20 unique components, this can be done in under 10 minutes. After integration, it is wise to run a Design Rule Check (DRC) to verify that all footprints have correct clearance and that no pads are overlapping. A common issue is that the generated footprint may have slightly different dimensions than the default library; always compare the generated footprint with the manufacturer’s recommended layout using a measurement tool. For example, if the datasheet specifies a pad length of 0.6 mm and the generator produced 0.55 mm, manually adjust the footprint. Many generators also support netlist synchronization, meaning any changes to the schematic symbol automatically update the footprint properties. This bidirectional linking is a powerful feature that maintains consistency throughout the design lifecycle.
Common Mistakes Beginners Make and How to Avoid Them
Even with a component generator, beginners frequently encounter pitfalls that can compromise their designs. One major mistake is using default generator settings without verifying them against the datasheet. For instance, a generator might assume a standard pin pitch of 2.54 mm for a DIP-8 package, but some manufacturers use 2.50 mm. This 0.04 mm difference can cause the IC to not fit into the socket. Always override defaults with datasheet values. Another error is ignoring 3D model accuracy; a generated 3D model may have the correct dimensions but incorrect color or height, leading to mechanical interference in the enclosure. For example, a tall electrolytic capacitor might be modeled as a short cylinder, causing it to hit the case lid. To avoid this, compare the 3D model’s height to the datasheet’s maximum height specification. Beginners also forget to generate a separate symbol for each variant of a component; a resistor with a 1% tolerance might have the same footprint as a 5% one, but the symbol should reflect the different value. Use the generator’s variant management feature to create multiple symbols from a single footprint. Finally, always back up your generated libraries, as software updates can sometimes corrupt custom files. A cloud backup or version control system like Git can save hours of rework.
Optimizing Component Generators for Manufacturing and Assembly
Component generators are not just for design; they also play a crucial role in manufacturing preparation. When generating footprints, ensure they include assembly-related features such as fiducial marks, solder paste layers, and component outline silkscreen. For example, a generator can add a crosshair fiducial at the corner of a large BGA package to assist pick-and-place machines. The solder paste layer should have a stencil aperture that matches the pad size, typically 1:1 for fine-pitch components. For a 0.4 mm pitch QFN, the generator might reduce the stencil aperture to 0.35 mm to prevent solder bridging. Additionally, the component outline on the silkscreen should be clear and include pin 1 orientation, such as a dot or a chamfer. Many generators also output a Bill of Materials (BOM) in CSV format, listing all generated components with their values, tolerances, and manufacturer part numbers. This BOM can be directly imported into procurement systems. According to manufacturing experts, using a generator that adheres to IPC-7351B reduces assembly defects by up to 30% because the land patterns are optimized for reflow soldering. Beginners should always request a design for manufacturing (DFM) check from their PCB fabricator, using the generated files as the baseline.
Exploring Advanced Features: Scripting and Automation
For beginners who want to scale their skills, learning the scripting capabilities of component generators can be a game-changer. Many generators support Python or JavaScript scripting to automate repetitive tasks. For instance, you can write a script that generates a family of resistors in all standard E-series values (E12, E24) with a single command. The script would loop through resistance values, generate the symbol with the correct text, and assign the footprint automatically. Another advanced feature is parameterized component creation, where you define variables like pin count and pitch, and the generator creates a dynamic component that updates when you change the variables. This is particularly useful for connectors, where the number of pins can vary. For example, a script for a 2.54 mm header can generate 2-pin, 4-pin, and 8-pin versions from the same template. Some generators also integrate with online component databases like DigiKey or Mouser, pulling real-time datasheet parameters directly into the generator. This eliminates manual data entry entirely. Beginners should start with simple scripts that modify existing components, then gradually build a library of automated scripts for their most-used parts. The time savings are substantial: a script can generate 100 components in the time it takes to manually create one.
Comparing Popular Component Generator Tools
To make an informed choice, beginners should compare the leading component generator tools available. Altium Designer’s built-in generator, part of the ActiveBOM and IPC Compliant Footprint Wizard, is highly regarded for its adherence to IPC standards and integration with the Altium ecosystem. It costs a premium but offers real-time 3D visualization and automatic BOM generation. KiCad’s Component Generator plugin is free and open-source, with a growing community that shares scripts and templates. It supports parametric input and exports to KiCad’s native format, but lacks some advanced features like automatic thermal pad calculation. SnapEDA and Ultra Librarian are cloud-based services that provide pre-generated components, but they are not true generators—they rely on user-contributed libraries, which may have errors. For beginners on a budget, KiCad’s plugin is the best starting point, as it offers a hands-on learning experience without financial investment. A survey of hobbyists found that 70% prefer KiCad for prototyping due to its low cost and flexibility. However, for professional use, Altium’s generator is often recommended because it reduces the risk of manufacturing errors through built-in validation rules. Whichever tool you choose, ensure it supports the file format of your PCB design software and offers a trial version to test its workflow.
Building a Personal Component Library with a Generator
One of the long-term benefits of using a component generator is the ability to build a personal library of validated components. Instead of searching online for each new part, you can generate and store them in a structured folder system. For example, create subfolders for passive components, ICs, connectors, and electromechanical parts. Name each file with a consistent convention, such as “RES_0603_10k_1%” for a 10k ohm resistor. This makes it easy to search and reuse components across multiple projects. When you generate a component, also save a text file with the datasheet parameters and the date of generation, so you can trace back any errors. Over time, this library becomes a valuable asset, reducing design time for future projects by up to 50%. Beginners should also share their libraries with online communities, as many generators support import/export of library archives. For instance, the KiCad community has a shared library of over 10,000 generated components, which you can download and adapt. Remember to periodically update your library with new components as your projects become more complex, such as adding RF modules or microcontrollers. A well-maintained library is a hallmark of an efficient electronics designer.
Ensuring Compatibility with PCB Design Software
Before generating components, verify that the output format is compatible with your PCB design software. Most generators support common formats like IPC-2581, ODB++, or native formats like .PcbLib for Altium and .kicad_mod for KiCad. If your software uses a proprietary format, look for a generator that offers a conversion tool or plugin. For example, the Ultra Librarian generator can output in over 20 formats, including Cadence Allegro and Mentor PADS. Beginners should test the generated component in a dummy project first, placing it on a board and running a DRC. If errors appear, such as missing pad numbers or incorrect layer assignments, adjust the generator’s settings. Another compatibility issue is the coordinate system: some generators use a different origin point than your PCB software, causing components to appear off-grid. Set the generator’s origin to the center of the component or pin 1, depending on your software’s convention. Also, ensure that the generated 3D model uses the same unit system (millimeters or inches) as your mechanical CAD software. A mismatch can cause the 3D model to be scaled incorrectly, leading to enclosure fit problems. By performing these checks early, you avoid costly redesigns later.
Leveraging Online Resources and Communities for Support
Beginners should not hesitate to use online resources to master component generators. Websites like the EEVblog forum, Reddit’s r/PrintedCircuitBoard, and the official KiCad forums have dedicated sections for component generation. Many experienced users share their generator scripts and troubleshooting tips. For example, a common issue is that a generated footprint does not align with the datasheet’s recommended land pattern; forum members often provide corrected parameters or alternative generator settings. YouTube tutorials also offer step-by-step visual guides for specific generators, such as creating a BGA footprint in Altium. Additionally, many generator tools have built-in help systems with example projects. For instance, the KiCad Component Generator plugin includes a sample project for a USB-C connector, showing all input parameters and the resulting output. Beginners can download these examples and modify them for their own use. Another valuable resource is the IPC standards library, which provides predefined land pattern templates for thousands of package types. By combining these resources with hands-on practice, beginners can quickly become proficient in component generation, reducing their reliance on pre-made libraries and gaining full control over their PCB designs.